Step 1 - Create application structure in the Pages window
In this step of the tutorial you first create Kanzi Studio project and import assets, then you use the Pages window to create the application structure. In the last section of the step you create the navigation buttons for the application.
Assets for the tutorial
The assets you use in this tutorial are stored in <KanziWorkspace>/Tutorials/Pages/Assets.
The <KanziWorkspace>/Tutorials/Pages/Completed directory contains the completed project of this tutorial.
Create a project and import assets
In this section you create a project and import assets you use to create the application in this tutorial.
To create a project and import assets:
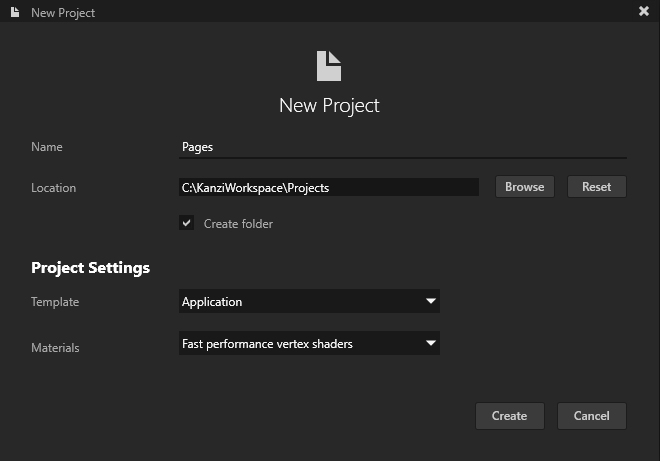
In the Kanzi Studio in Quick Start screen click New Project.
In the New Project window name your project. You can leave all other values as they are. Click Create to create the project.
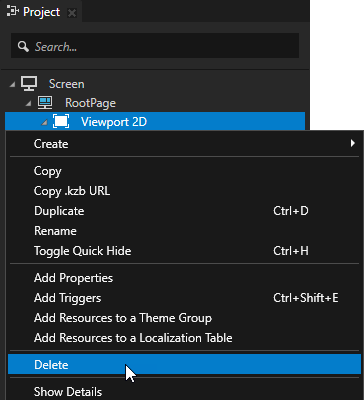
In the Project right-click the Viewport 2D node and select Delete to delete the node. You can delete the Viewport 2D node because you do not create any 3D content in this tutorial.
In the Project select the Screen node and in the Properties set:
Metrics Type to Absolute
Width to 1200
Height to 720
This way you set the size of the application screen.
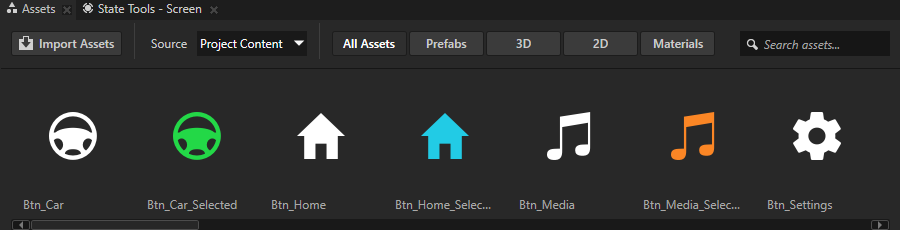
In the Assets window located in the bottom part of the Kanzi Studio window click Import Assets.
Go to the <KanziWorkspace>/Tutorials/Pages/Assets directory, select all files, and click Open. Kanzi Studio imports the selected assets to your project and shows them in the Assets window. Use the Assets window to view, select, and use the assets in your project.
Create the application structure
In this section you create the application structure with Page and Page Host nodes using the tools in the Pages window. In Kanzi Studio the Pages window is by default next to the Library and Dictionaries windows.
To create the application structure:
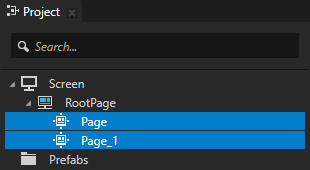
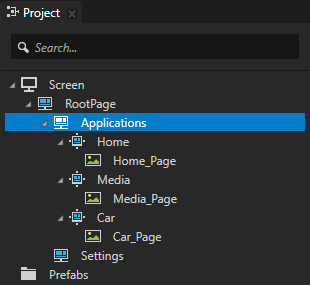
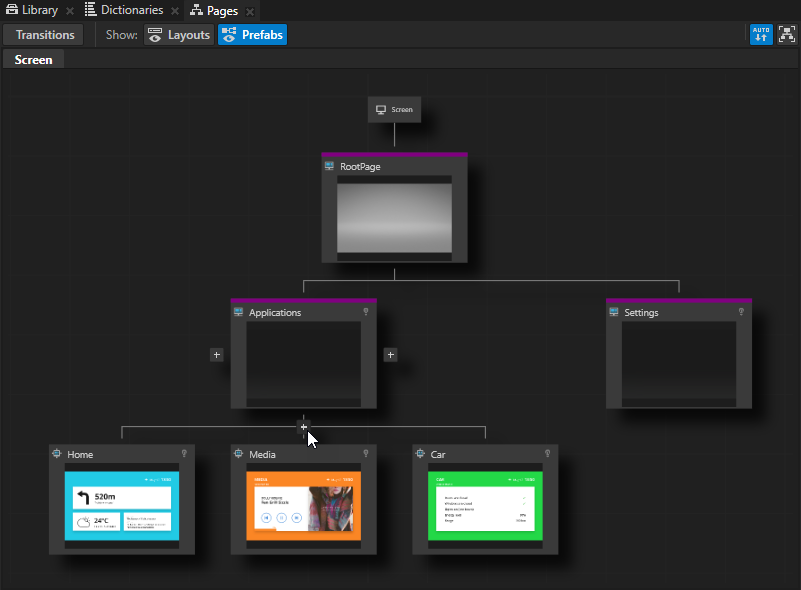
In the Pages window move your mouse pointer over the RootPage and click twice to create two Page nodes under the RootPage node. When you create Page nodes in the Pages, you can see the same Page nodes in the Project too.
To pan and zoom in the Pages window, use these controls:
Control
Description
Click and drag the middle mouse button.
Press the Space key, and click and drag the left mouse button.
Pan
Scroll the mouse wheel.
Press the Shift and Alt keys, and click and drag the left mouse button.
Zoom
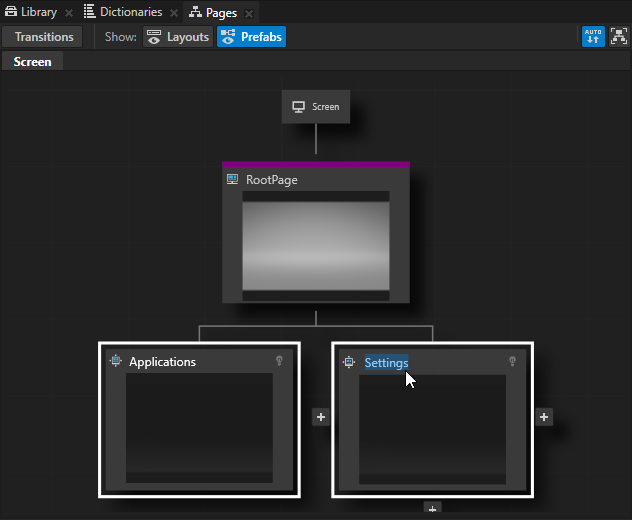
In the Pages double-click the names of the Page nodes you created in the previous step and rename them to Applications and Settings.
In the Pages right-click the Applications and SettingsPage nodes and select Convert to Page Host. Use a Page Host node to group other Page Host and Page nodes. The main difference between the Page and Page Host nodes is that the Page Host node manages navigation requests and transitions in its tree. In this tutorial the ApplicationsPage Host holds the content of Page nodes, each of which represents an application, while the SettingsPage Host node holds the content of a popup window that is shown on top of the applications. You add content to the Settings popup window in the next step of the tutorial.
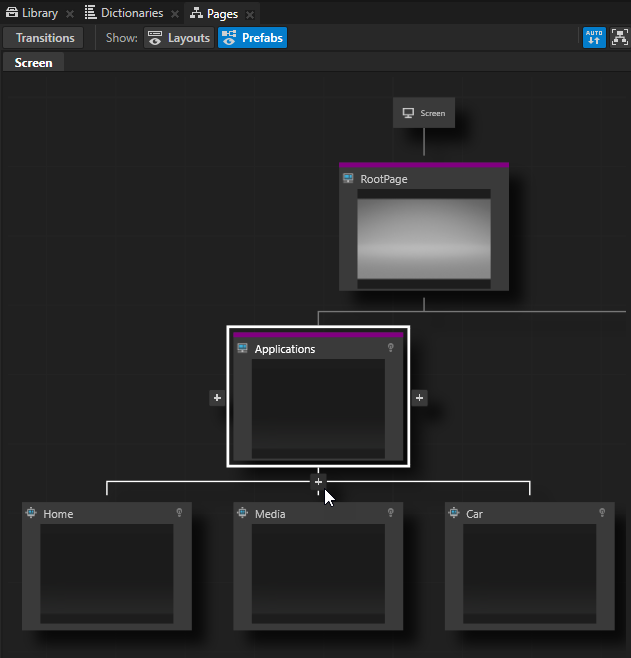
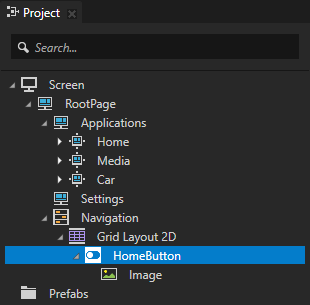
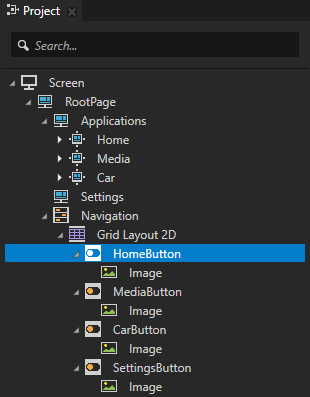
In the Pages move your mouse pointer over the ApplicationsPage Host node and at the bottom of that node click three times to create three child Page nodes under the ApplicationsPage Host node, and name them Home, Media, Car. Each of these Page nodes holds the content for their application. For prototyping purposes in this tutorial you add only images of these applications. However, when you move your application from the prototype phase to the development phase, replace the placeholders with the content of these applications. Tip To see the entire structure of Page and Page Host nodes in your application, in the Pages window click .
From the Assets to the Pages window drag and drop:
Home_Page texture to the HomePage node
Media_Page texture to the MediaPage node
Car_Page texture to the CarPage node
When you drop an image from the Assets on a Page or a Page Host node in the Pages, Kanzi Studio creates an Image node with the image you dropped. Tip When you click on any Page or Page Host node in the Pages window, Kanzi transitions to that node and you can see the transition in the Preview.
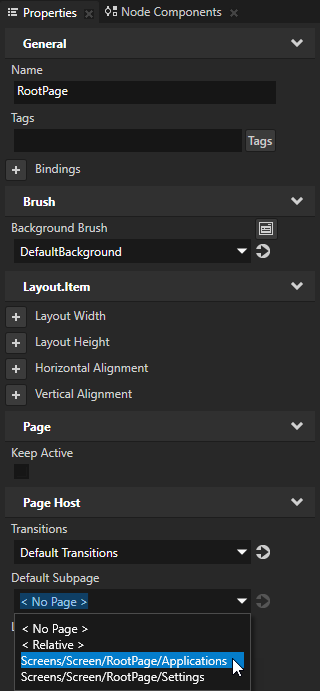
Configure the application so that it shows the contents of the HomePage node when you start the application:
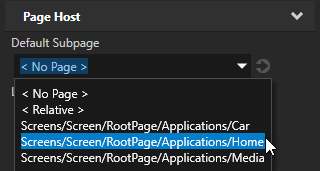
In the Project select the RootPage node and in the Properties set the Default Subpage property to the ApplicationsPage node. By setting the Default Subpage property you tell Kanzi which Page or Page Host node to activate when this Page Host becomes active.
In the Project select the Applications node and in the Properties set the Default Subpage property to Home.
Create the application navigation
In this section you create the navigation buttons at the bottom of the application user interface which you use to navigate between the Home, Media, and Car applications, and the Settings popup window.
One of the characteristics of the Page and Page Host nodes is that the content of all active Page and Page Host nodes in an application is always shown. Because the RootPage node is at the top of the hierarchy it is always active and all the content in the RootPage node is always shown on all Page and Page Host nodes in the application. This is why RootPage node is a good place to hold the navigation buttons for the whole application.
To create the application navigation:
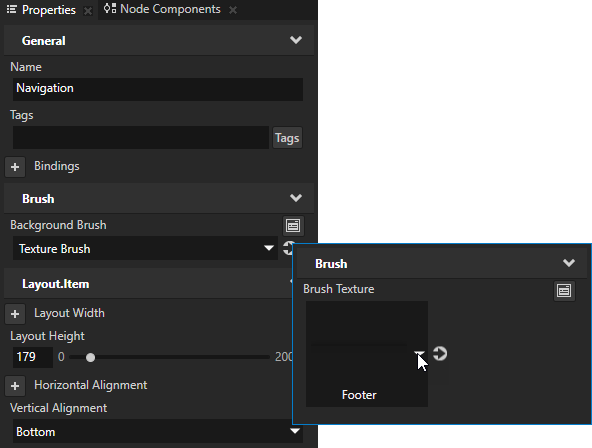
In the Projectpress Alt and right-click the RootPage node, select Toggle Button Group 2D, name it Navigation, and in the Properties add and set:
Layout Height to 179
Vertical Alignment to Bottom
Background Brush to + Texture Brush, click next to the property name, and set the Brush Texture property of the brush to the Footer texture. Tip In the Properties click next to a property to access and edit the resource to which the property points without moving away from the currently selected node.
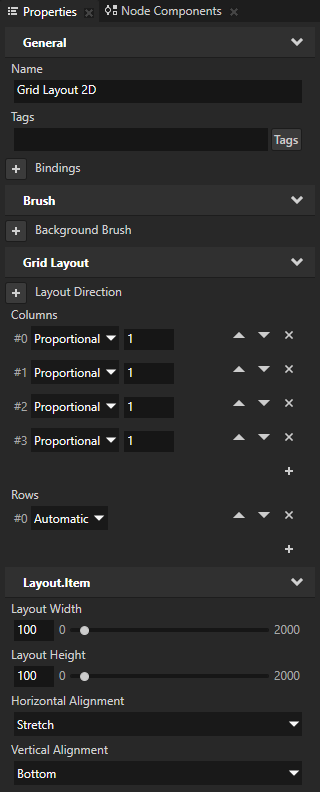
In the Projectpress Alt and right-click the Navigation node, select Grid Layout 2D node, and in the Properties:
In the Columns click to add one more column. You need four columns in the Grid Layout 2D node because there are four buttons in the navigation.
Set all columns to Proportional. This way each button takes an equal amount of space in the Grid Layout 2D node.
In the Rows click to remove all but one row. You need only one row in the Grid Layout 2D node because there is only one row of buttons in the navigation.
Add and set Horizontal Alignment to Stretch. When you set the Horizontal Alignment property to Stretch you tell the node to take as much space on the x axis as it can.
Add and set Vertical Alignment to Bottom.
Create the navigation buttons in the Grid Layout 2D node which you use to navigate to different Page and Page Host nodes in your application:
In the Project in the Grid Layout 2D create a Toggle Button 2D node, name it HomeButton, and inside it create an Image node.
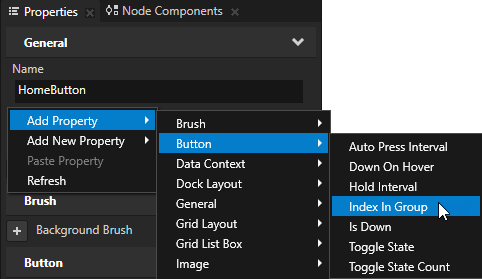
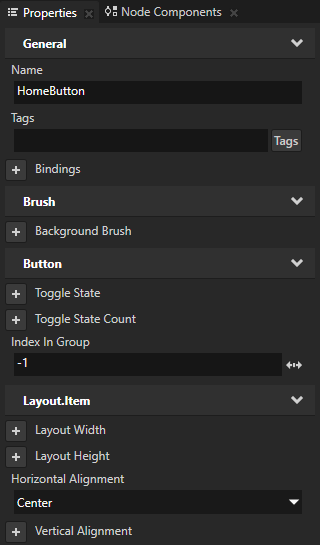
In the Project select the HomeButton node, and in the Properties add and set:
Horizontal Alignment to Center
Index in Group property Tip To quickly add a property, right-click in the Properties, select Add Property, and then select the property you want to add. For example, to add the Index in Group property, right-click in the Properties, and select Add Property > Button > Index in Group.
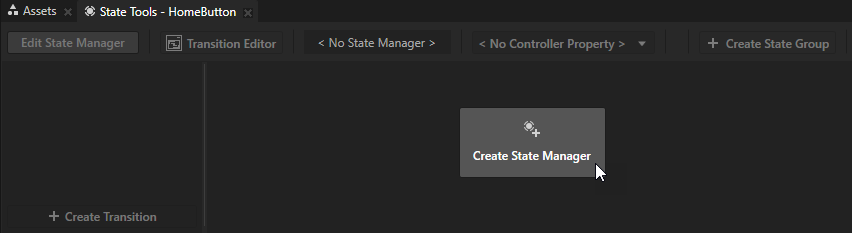
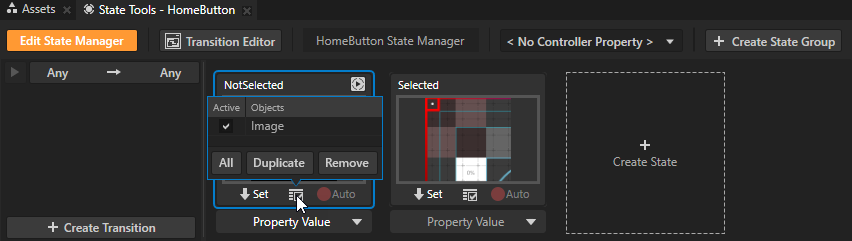
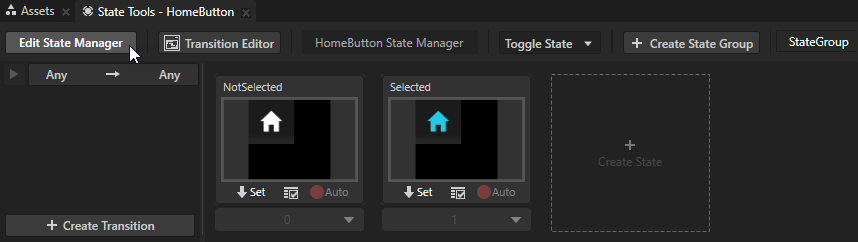
In the Project select the HomeButtonToggle Button 2D node and in the State Tools click Create State Manager to create a state manager. You can find the State Tools at the bottom of the Kanzi Studio interface, below the Preview.
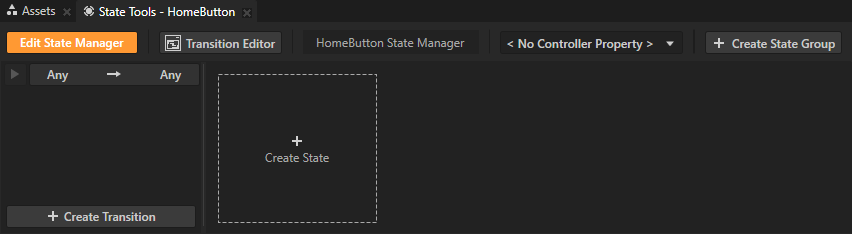
In the State Tools click Create State to create a state. Create two states, double-click the state names, and name them NotSelected and Selected.
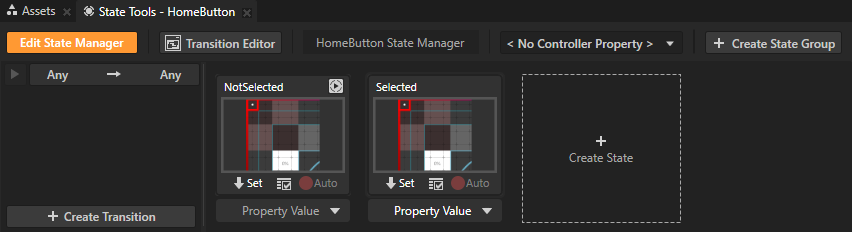
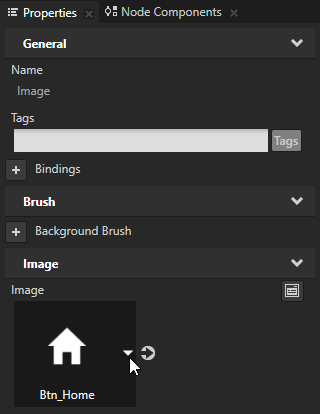
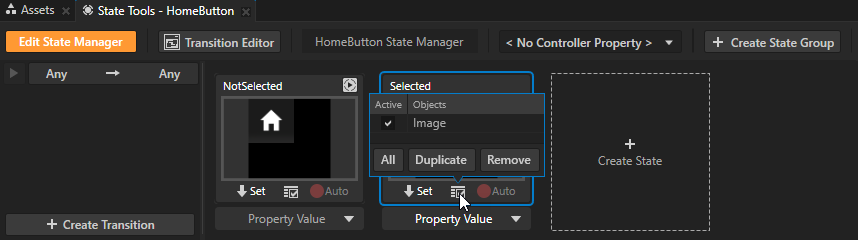
In the Project select the HomeButton > Image node, in the Properties set the Image property to the Btn_Home texture, and in the State Tools click to save the change to the NotSelected state.
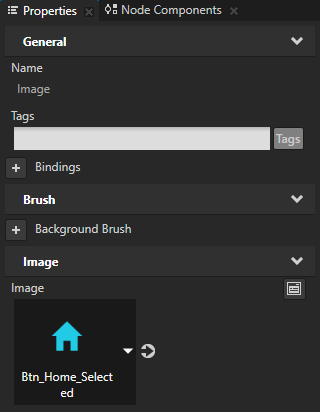
Set the Image property to the Btn_Home_Selected texture and in the State Tools click to save the change to the Selected state.
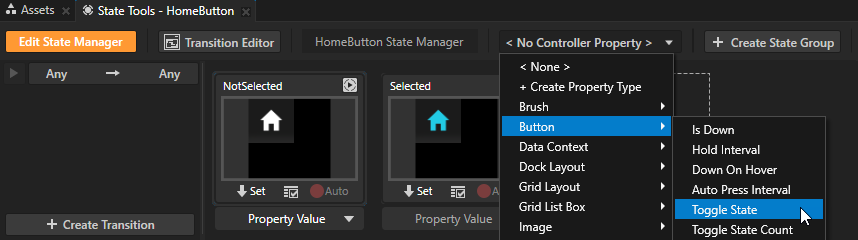
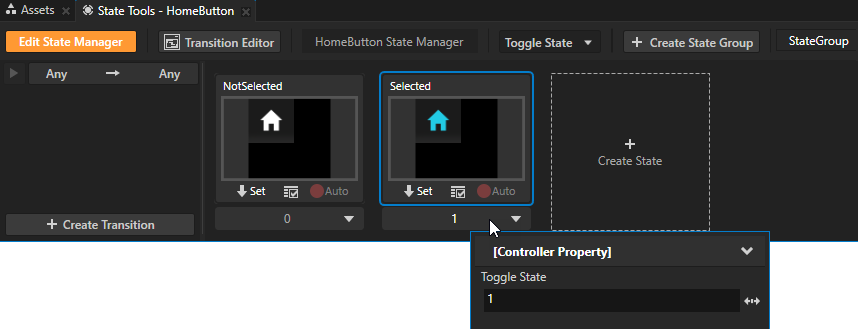
In the State Tools click the <No Controller Property> dropdown menu and select the Button > Toggle State property. In a state manager the value of the property you select as the Controller Property defines the conditions when each state in a state group is active.
In the State Tools set the value of the Toggle State controller property for each state. For the Selected state set the value to 1, and for the NotSelected state leave the value set to 0. With this setting when the value of the Toggle State property is 0 in the node which uses this state manager, the state manager sets the application state to the NotSelected state, and when it is 1 it sets the application state to the Selected state.
In the State Tools click Edit State Manager to deactivate the State Tools. Tip When State Tools are switched on Kanzi Studio keeps track of all property changes in your project. For this reason it is a good practice to switch the State Tools off when you are done setting the states in a specific state manager.
In the Project select the HomeButton node, in the State Tools click the Any -> Any transition, in the State Transition Editor set the Duration property to 0, and click Save. In a State Transition Editor when you set the Duration property to 0 Kanzi transitions instantly between the selected states.
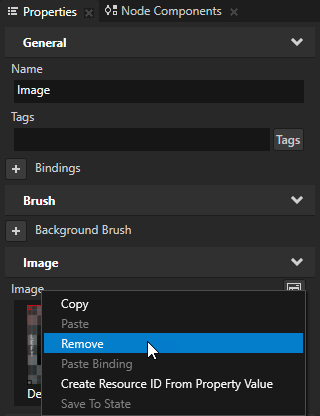
In the Project select the HomeButton > Image node, in the Properties right-click the Image property and select Remove. If you want the state manager to apply the value of a property, remove the local value of that property.
Repeat the previous step to create the MediaButton, CarButton, and SettingsButton toggle buttons. For these toggle buttons in the Image node use these textures:
For the MediaButton use the Btn_Media for the NotSelected and the Btn_Media_Selected texture for the Selected state.
For the CarButton use the Btn_Car for the NotSelected and Btn_Car_Selected texture for the Selected state.
For the SettingsButton use the Btn_Settings for the NotSelected and Btn_Settings_Selected texture for the Selected state.
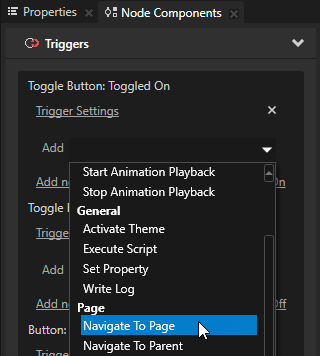
In the Project select the HomeButtonToggle Button 2D node, in the Node Components > Triggers section in the Toggle Button: Toggled On trigger click the Add dropdown menu, select the Navigate to Page action, and in the Navigate to Page action window select the HomePage node.
Repeat the previous step for the MediaButton and CarButton toggle buttons. For these toggle buttons set the Navigate to Page action:
For the MediaButton set the MediaPage node.
For the CarButton set the CarPage node.
When you click the Home, Media, and Car buttons in the Preview you go to the Page nodes you set in the Navigate to Page actions. Tip In the Interact mode you can interact with your application in the Preview window as you would on a device. When you are using a Preview tool, to switch to the Interact mode, in the Preview window click .


 twice to create two
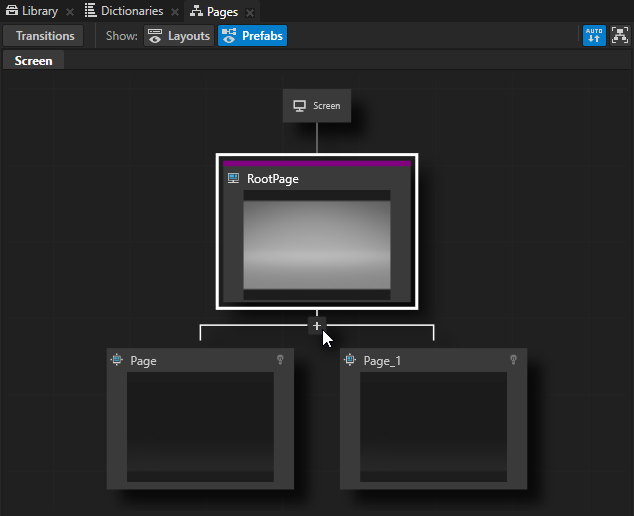

 .
.
 next to the property name, and set the
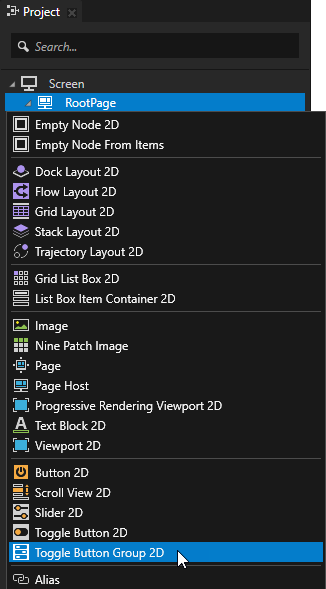
 to add one more column.
 to remove all but one row.
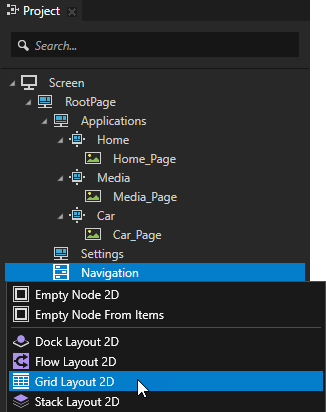
 to save the change to the

 .
.